

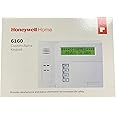
Security 6160 Ademco Alpha Display Keypad
Details
- BrandHoneywell
- ColorWhite
- Power SourceBattery
- Compatible DevicesAdecco Vista
- Item dimensions L x W x H5 x 2 x 8
Description
🛡️ Elevate your security game—smart, sleek, and always connected.
- MOTION ALERT READY - Stay instantly informed with built-in motion detection alerts.
- COMPACT SLEEK DESIGN - Fits discreetly anywhere with a modern 5x2x8 inch profile.
- VISTA PANEL COMPATIBILITY - Optimized for Honeywell Adecco Vista Alarm Panels for flawless performance.
- WIRELESS BATTERY POWERED CONTROL - Cut the cords and control your security remotely with ease.
- EFFORTLESS SELF ADHESIVE INSTALLATION - Stick it up and secure your space in minutes—no tools needed.
The Honeywell Security 6160 Ademco Alpha Display Keypad is a wireless, battery-powered control device designed for seamless integration with Adecco Vista Alarm Panels. Featuring a compact 5x2x8 inch design and easy self-adhesive installation, it offers motion alert capabilities and remote control functionality, backed by a 1-year manufacturer warranty.
Specifications
| Brand | Honeywell |
| Color | White |
| Power Source | Battery Powered |
| Compatible Devices | Adecco Vista Alarm Panels |
| Item dimensions L x W x H | 5 x 2 x 8 inches |
| Connectivity Technology | Wireless |
| Installation Type | Self-Adhesive |
| Alert Type | Motion |
| Item Weight | 0.93 Pounds |
| Control Method | Remote |
| Included Components | Keypad |
| Global Trade Identification Number | 00781410342088 |
| UPC | 781410342088 |
| Manufacturer | LiveWatch Security |
| Part Number | 6160 |
| Item Weight | 14.9 ounces |
| Product Dimensions | 5 x 2 x 8 inches |
| Item model number | 6160 |
| Is Discontinued By Manufacturer | No |
| Item Package Quantity | 1 |
| Batteries Included? | No |
| Batteries Required? | No |
| Warranty Description | 1 year Manfufacturer's Warranty |
Reviews
J**N
Perfect fit, easy to maintain. Beautiful!
Perfect fit, easy to maintain. Beautiful!
T**D
Perfect replacement for a worn out 30 y/o Keypad
Very easy to install, just swap out and program the unit. Plenty of instructions on youtube or search for a 6160 pdf manual. Took about 5 - 10 minutes, works flawlessly. Saved a few hundred dollars. Super fast shipping.
A**R
Easy to install. Why pay $150 elsewhere
Need to replace a failing Ademco (non-RF) keypad, then look no further. The 6160 is considered the best keypad available by professional installers. I’m just a DYI’er.1. At the failing keypad with the system on, press and hold 1 and 3 buttons for 3 seconds and record location address.2. Next, power down your system at the panel by unplugging the wall transformer and removing the wire from red terminal on all backup batteries.3. Remove old keypad from mounting bracket (look on underside for tabs to depress) by lifting up from the bottom.4. Take a pic of the wiring arrangement. Remove old mounting bracket and replace with the 6160 mounting bracket.5. Attach wires to terminals indicated with using a small Phillips-head screwdriver (refer to your pic) and snap keypad onto the bracket.6. Now back to your panel and reattach the battery wires and plug in the transformer.7. Within 90 seconds of doing this, follow instructions on back of the 6160 box to change the preset "location address" of the keypad to the one you recorded earlier. Panel will register new keypad and reboot in a handful of seconds.Voila! You're done. Should take under 10 min if slow and methodical.
S**Y
Easy to install, works very well
I have the three letter security service. I called them bc one keypad wasn't working well. They told me my system was old and there were no compatible keypads, and I needed a new system for $1800.00 and they needed to increase my monitoring price by 1/3. I went on line and read that my system is still rated as one of the best on the market, and I have been upgrading sensors , smoke detectors and CO sensors every few years. I went on Amazon and read the reviews on this, and read the great instructions posted by reviewers and their videos. I just followed the instructions, and it took me about a half hour to install. It works very well, and looks great. It saved me over $1600.00 and also showed me that my big name monitoring company really wasn't being completely honest with me. Thanks to all the reviewers who posted!
M**.
Instructions not that helpful
Price increased over $30 since I started "shopping" this item starting several years ago. The keypad has 4 speed buttons, but came with no instructions how to program them.
N**K
Good price for a reliable keypad on a proven alarm system
Great price for a very reliable keypad on a very reliable alarm system. Alpha keypads make programming much easier by providing feedback on the screen for fields you’re entering. Great for the alarm system DIYer.Replaced a fixed English keypad on an ADT Safewatch Pro 3000 system (which is just a branded Honeywell Vista 20P). Swapping it out was very easy. Remove power to alarm system by unplugging ac adapter (& cut power to battery by unplugging lead). Existing wall mount screw holes worked for the new keypad. Wired it up as old one was wired (there are also indicators on the board for which wires go where, positive is red negative is black). Fired up the alarm system again & instructed the keypad to use address 16 (as did old keypad) by pressing & holding 1 & 3 at the same time and then entering 16 & exiting with *. Took a couple of seconds for the keypad to register & then synced right up!Note that the tone is more of a car door opening sound and less of a sharp beep. Not as loud as the old keypad but totally fine. I’ll get used to the new sound.
S**.
Makes life easier.
Install and addressing it was a breeze. I have 2-6150 keypads. One is an RF. I changed out the non-RF one at the garage entry door that we use all the time with the 6160. I left the 6150-RF in the master bedroom that really never gets used. But I need it for some wireless sensors. I did some programming on the 6160 and it was a lot easier to see what step your at. 6150 was a pain. The 6160 keypad is a little bigger and so is the LED screen which is nice. Seems a little brighter too. It is a lot quieter then the 6150 that was annoying loud. You can muffle the 6160 if you want by putting some folded up paper towel in front of the speaker on the inside. YouTube is very helpful about that and also programming it. I highly recommend getting this if you have the 6150 keypad. Real nice upgrade.
R**Y
Comes in handy since I have animals that like to jump and have set off the alarm if ...
These new key pads were so simple to install. I bought two pads and after the installation of the first I had an error message that a link was down. It turned out the data input and output wires were reversed though not sure where. Rolled those two wires and I was in business. Just completed the installation of the second unit and it came right up. For the past 13 years with the older ADEMCO unit I didn't realize I could activate the stay #3 and still leave. This pad gave me the message that it was possible. Comes in handy since I have animals that like to jump and have set off the alarm if I'm away. No documentation on alarm codes etc. So don't throw your old documentation away. Over 90% of the error messages are the same.. Hole on the back of the wall plate aligned exactly with the screws and holes that existed. So in the end was unscrew and re screw a new back plate. Bottom line I am totally happy.
Common Questions
Trustpilot
5 days ago
1 month ago
